
This is going to be a loooooooong read. We haven't published a substantial update in months so get ready for a detailed summary of our progress.
If you don't feel like reading a small novel - consider joining us at one of our upcoming training events. We'll be demonstrating these new features over breakfast on these two dates:
Anyone interested in CSDatum is welcome to attend and account holders will also receive an email invitation (or already have).
Now, on to the updates!
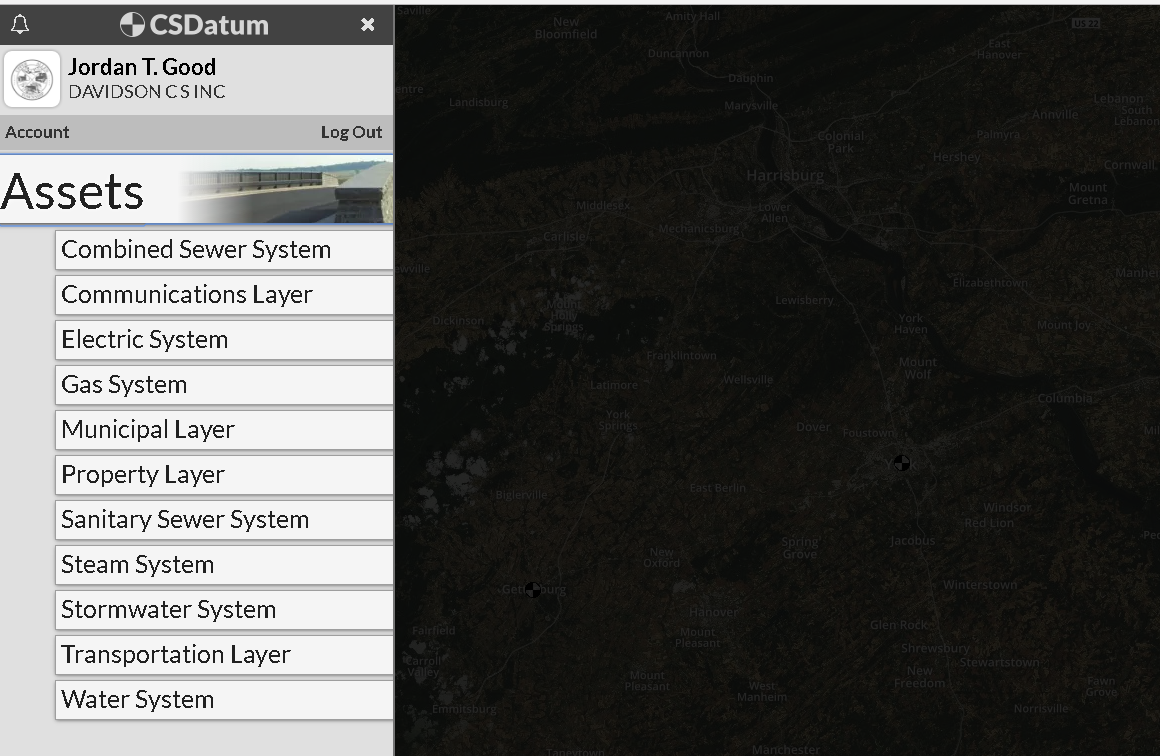
Attendees of the training event will catch a glimpse of our soon-to-be-released navigation system. Ever get frustrated clicking around in CSDatum? From the map to the tables to your account settings and then back to the map? It's a lot of clicks, we know. This upgrade is the brainchild of Mike Marsh - and we're excited to roll it out. We're calling it the 'menu drawer', as this small menu screen will slide out like a drawer from any page you're on. This will also make the future connection with Permit Manager much easier.
We will officially release this on July 3rd. If you're feeling wild and want to be a beta-tester right now - email me (Jordan) and I'll get you started.
Finally, right? You can now click on any row in Table view and edit the attributes directly. This should be very helpful when you notice inconsistent entries entered from the map or if you need to make a quick change. Just double click on your row and this familiar screen will pop up:

Keep in mind, it's still not Excel so you can't update multiple rows at a time or drag/autofill formulas - but it's a step in the right direction.
Credit to our friends at NEYCSA for these suggestions - and as result, everyone can now enter the following:
These tweaks should be pretty self-explanatory when you pop open the information on any sanitary sewer manhole.
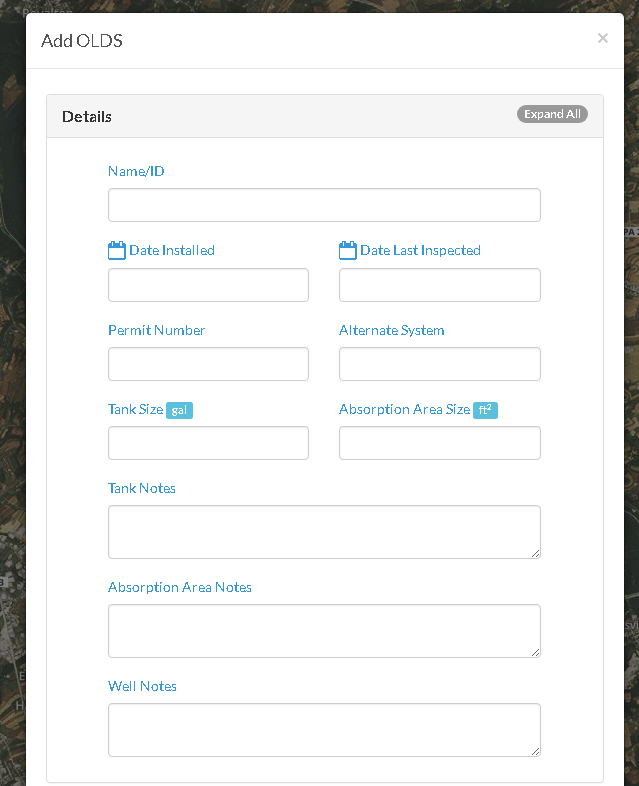
Sticking with the Sanitary layer - you can now add and track your on-lot disposal systems. If you don't see the Star icon, remember to click on the 'Add Asset' button to create a new layer. Then simply add the locations on the map like any other feature and enter as much of this information you'd like:
If you're still reading, it's probably because you're looking for the stormwater updates - easily the most used features within CSDatum. If you weren't able to waiver out of the new requirements (Derek could have helped you - he was 10 for 10!) - here's what you need to know:
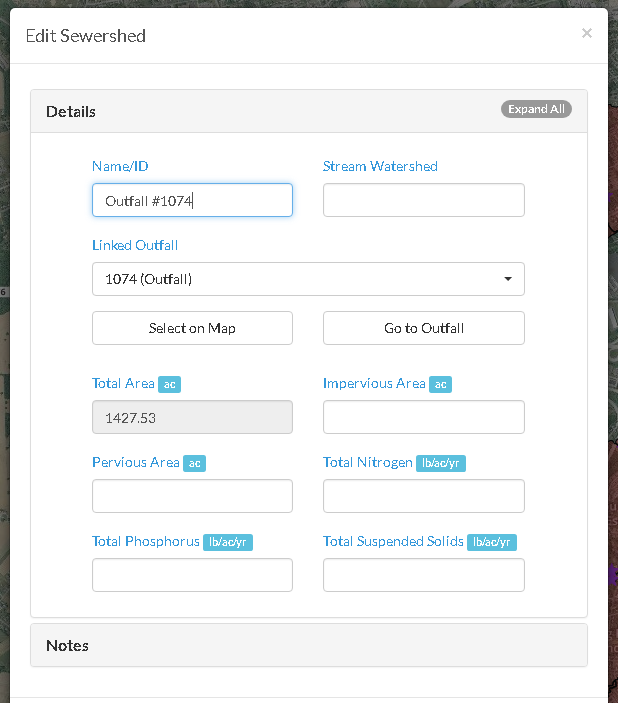
Storm Sewershed Overlays. If you've already mapped your outfall drainage areas - send us the GIS shapefiles and we can easily import them. If you enjoy tracing contours and tedious work (still have a planimeter laying around?), you can also draw these polygons by hand in CSDatum. They will appear similar to the screenshot below, an 'Overlay' within the Stormwater Layer. I chose here to change the fill color to red and the outline to black instead of the default blue. Remember, this can be done for any asset within any layer.
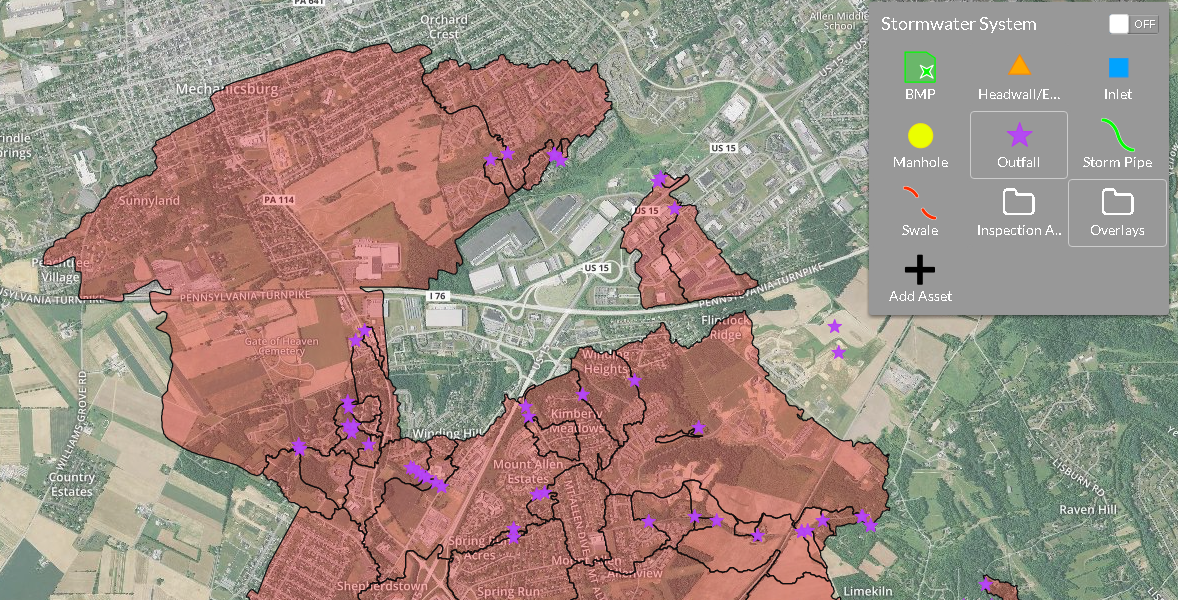
You can toggle this overlay on and off, edit the polygon boundaries in the field or store relevant attribute data - all in one place. You can also link the polygon to the relevant Outfall - which means you won't need to name it twice.
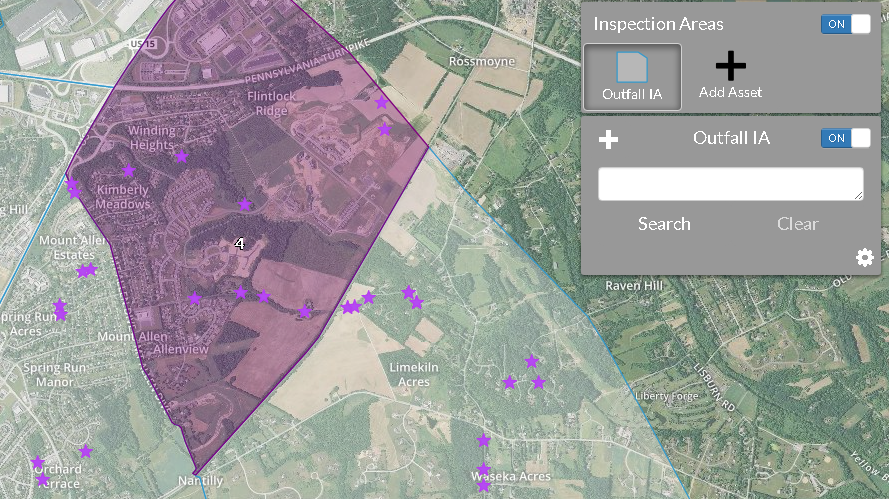
Outfall/BMP Inspection Area Overlays (aka quadrants or priority areas). If you're not familiar with this concept, it's really just a way to spread your inspection requirements over the life of the MS4 permit vs. inspecting them all, every year. Similar to the sewershed overlay - you can now add or draw these predefined 'inspection areas'. This replaces the clumsy dropdown list that we previously used, which forced you to pick your quadrant or area for every feature. Now? Simply draw the polygon regions and the program will know which outfalls or BMPs are within that area. And if you still want to inspect them all, every year? Just draw one big polygon.
Again, you can draw/edit your own areas or email us with your existing shapefiles for upload. If you're an existing engineering client of ours - these files are likely already in there....or if you've previously sent us your GIS files when creating your account.
There are a two huge incentives to drawing these areas. First, it gives you a heads-up display of which outfalls need inspected each year and when they were last visited. If you click on an inspection area, you'll see this:
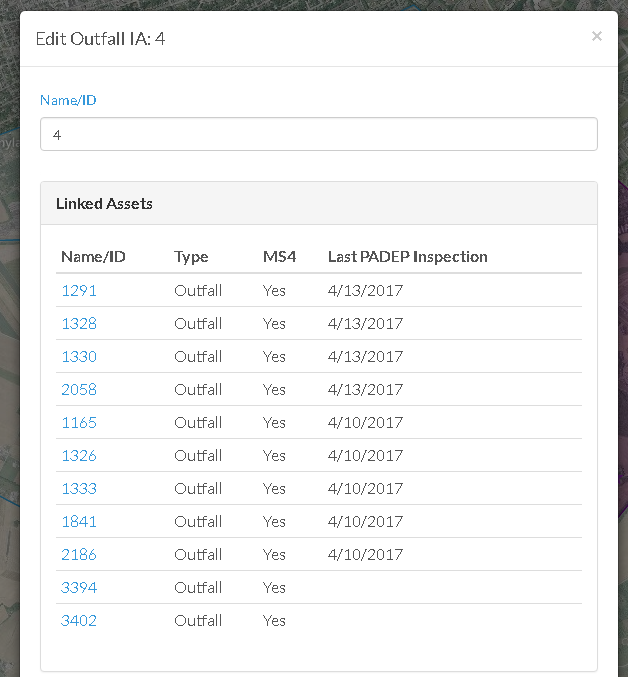
Handy, right? This exact same process is used for your BMP inspection areas, if you have them...and we will build something similar for inlet inspections in the next few weeks. The 2nd benefit will be seen below in the Annual Report compiler - as it grabs all these reports and stuffs them into your report.
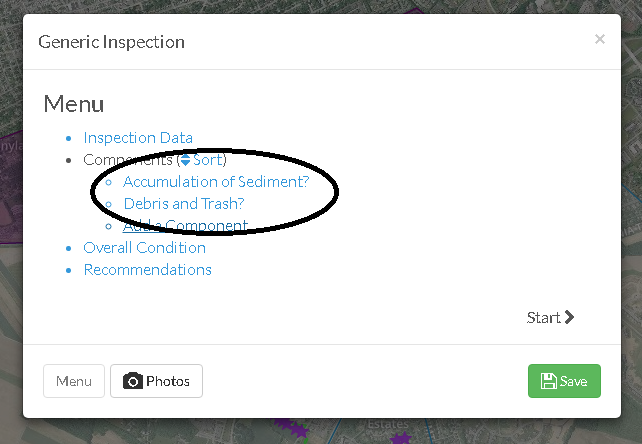
BMP Inspection Forms. You've been able to inspect BMPs in CSDatum for a long time - but now there are predefined inspection components for each and every BMP listed in DEP Stormwater Manual. Yes, that's right, even for BMP 6.6.4, Hydrodynamic Devices.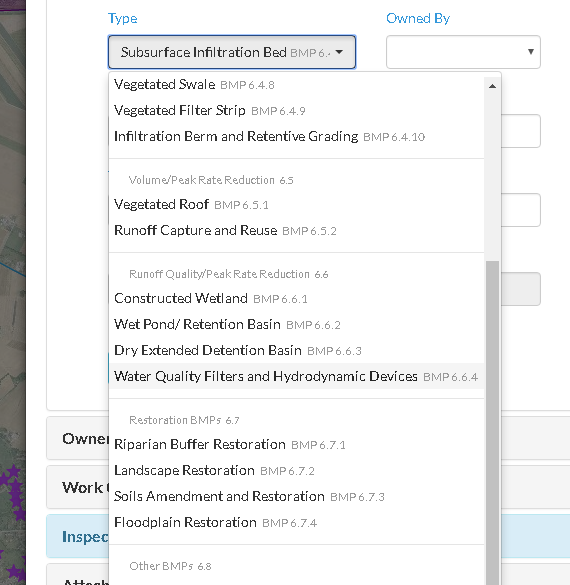
So based on how you've categorized your BMP - the Inspection Form will change - and the suggested components were lifted right out of the DEP Manual. You can still edit the components and add additional fields but we gave you these baselines for clarity and consistency.
Annual Report Improvements. Big changes here - notably in MCM 3 and the initial report creation. When you create a new report, you'll only be asked to pick the end of the reporting range and this screen will pop up.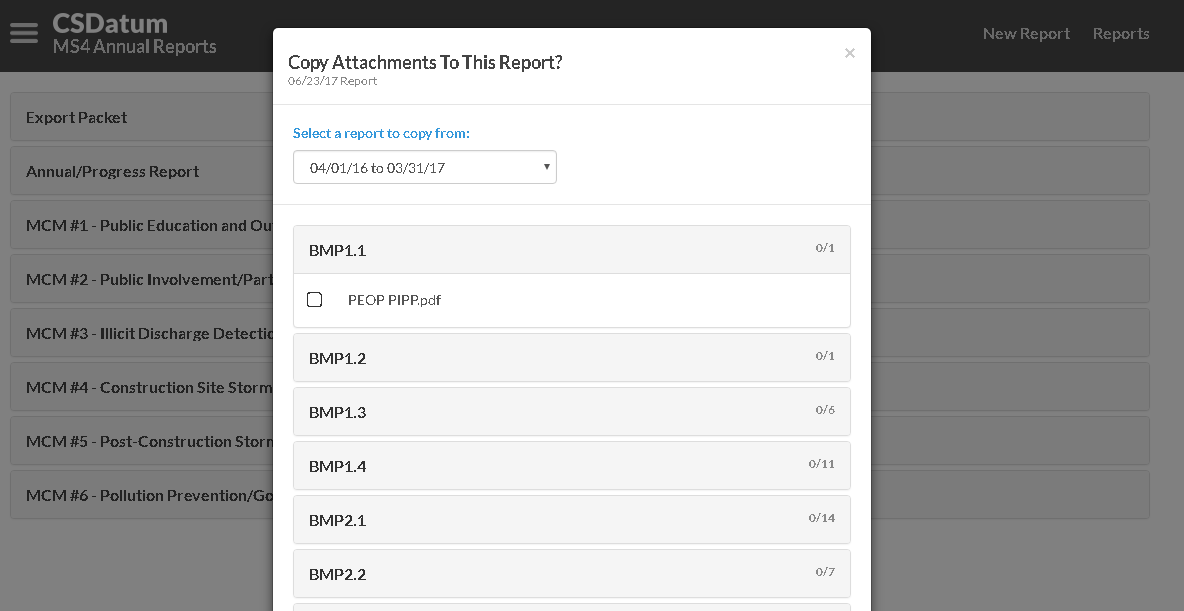
This screen allows you select a previous MS4 report and transfer any documents to the new year. The time saved here should be obvious - as nobody wants to spend their adult life shuffling around PDFs. This screen can also be launched later on from the Attachment section of each MCM/BMP - so it's not like you only get one shot at this.
Jumping down to MCM #3.4; you notice some changes to the Outfall Screening feature. By clicking on the settings (gear) icon after the 'Completed Screenings' section - you can now enter the start and end date of your inspection cycle. Previously this was hardwired to the Annual Report end date and very difficult to change.

The program will then summarize & link any Outfall that was inspected within that range.
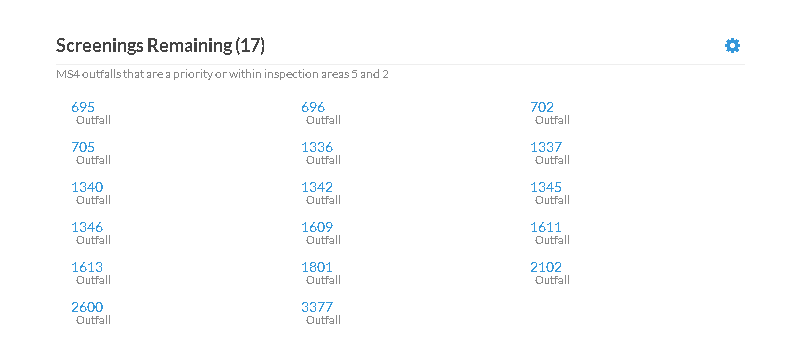
Remember that inspection area update? You can now select one or more of those areas after clicking on the settings (gear) icon after the 'Screenings Remaining' section.
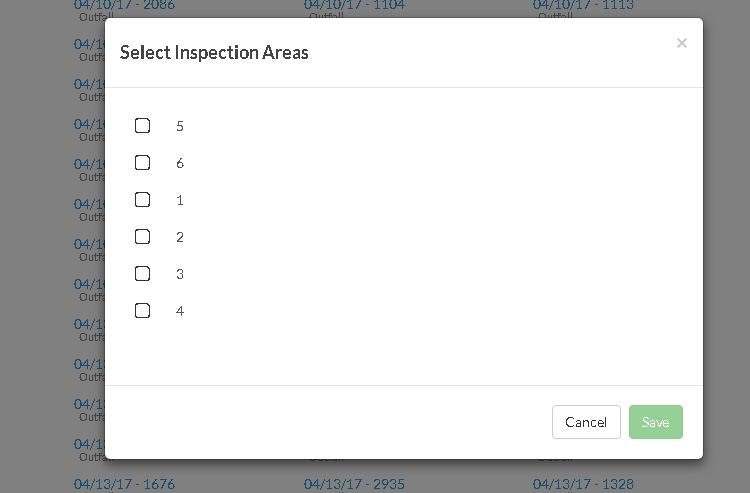
By doing so - the program will now calculate the MS4 Outfalls that still need inspected (and it also includes any Outfall that was tagged as a Priority Outfall) without the tedium of labeling each Outfall with a quadrant number.
Create your own Appendix with Attachments. Need another section in the Annual Report, say - for a Chesapeake Bay plan or review comments from DEP? Simply click on the generic section at the end of the MCM's and add as many sections as you need!
Still here? You have the reading willpower of an English Literature professor, well done - and Kerryn will reward you with an awkward hi-five if you attend one of those breakfast events. As always - if you have any questions or comments, let us know!
