
Up until now, only a select few assets had inspection forms available - including roadway signs, stormwater outfalls/BMPs, roadways, trees and bridges. Starting today - there's a simple yet flexible inspection form for EVERY single asset on the map. It works much like the other forms - only you're required to enter a 'Component' name before you start describing anything. For example, many of you have asked for a sanitary sewer manhole inspection form or a stormwater inlet form...well, this can be easily tailored to meet those needs. Here's how to use it.
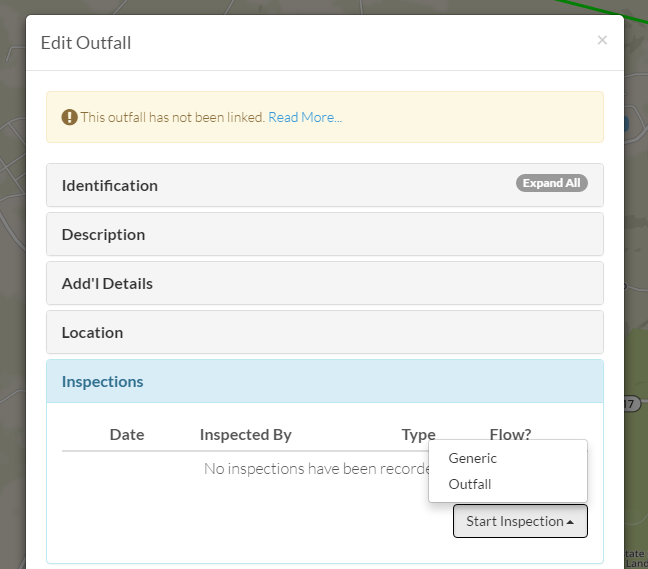
1. Navigate to any asset and look for the blue inspection panel. Click on 'Start Inspection' and choose either the generic or detailed form (this new form is considered the generic form).
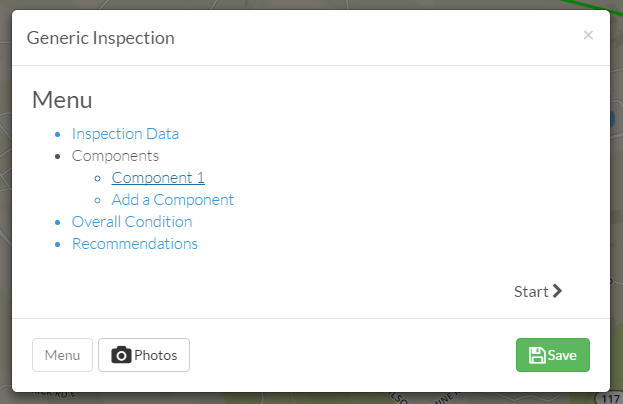
2. A small popup will appear that shall faithfully guide you through the inspection process. The menu is hyperlinked so you can easily jump around if need be.
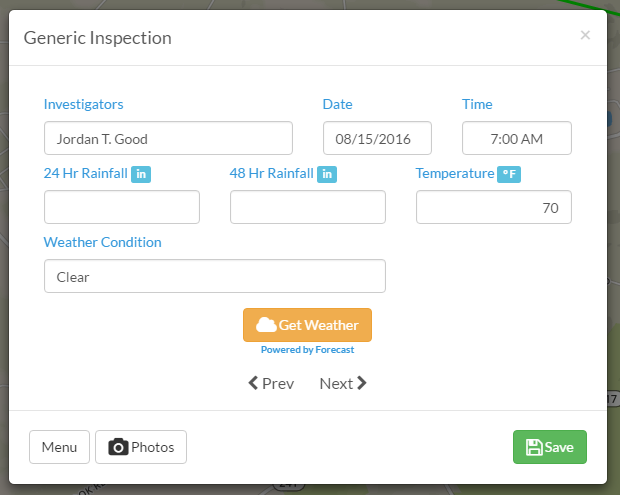
3. After clicking on 'Start' - you'll be prompted to fill in some basic information. After you enter the time of the inspection - you should be able to click the 'Get Weather' button to auto-populate the temperature and conditions. If you happen to be on a stormwater asset, the form will also ask for recent rainfall depths.
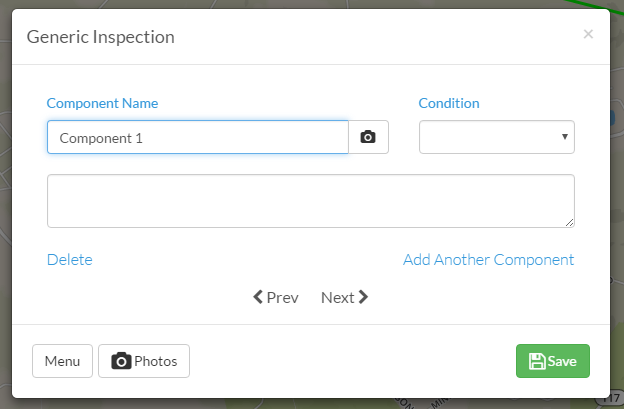
4. Start naming and describing your Components! This is the bulk of the inspection form - the place for you to document problems, existing conditions or perhaps a record of your maintenance activities. It's entirely up to you.
Note to all you mighty BMP inspectors: if you're inspecting a retention or detention basin - this form will be pre-populated with component names. We took the old BMP form that you might have used and crammed it into this new form and it will still get folded into your annual MS4 report.
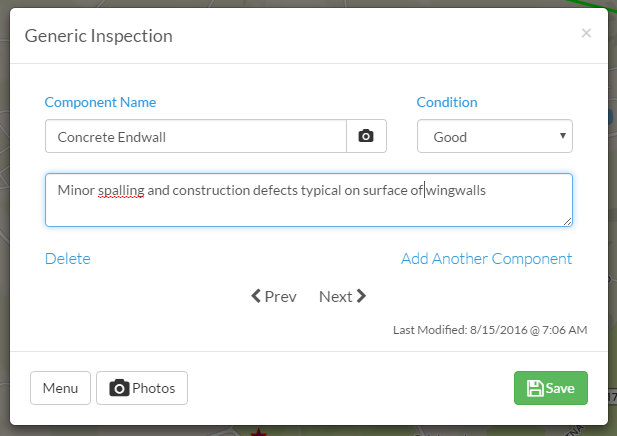
5. Here's a simple example - an inspection of a concrete endwall (not a PA DEP Outfall inspection - just a simple inspection for asset management purposes). Don't forget to add photographs - and as shown below, by using the camera icon - the program will name the photo 'Concrete Endwal' to save you from some extra tapping/typing.
Add as many Components as you'd like - or keep it simple and use only one.
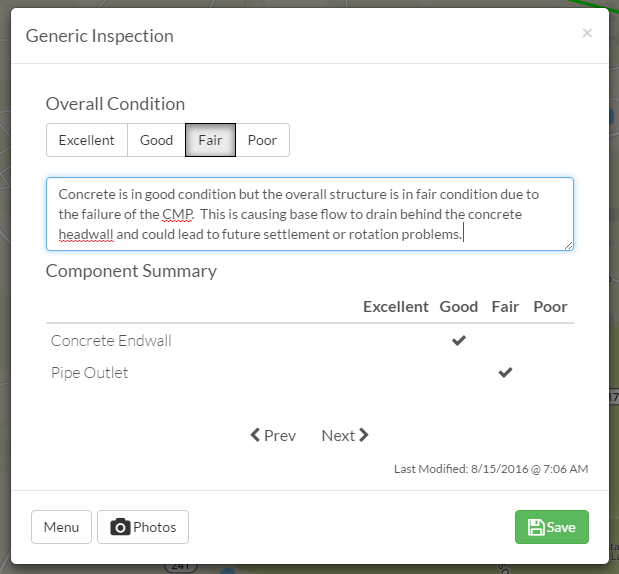
6. After you're done with your Components - advance to the Summary page. Here you can describe the overall condition - make broad statements about the asset and view a summary table of the smaller components.
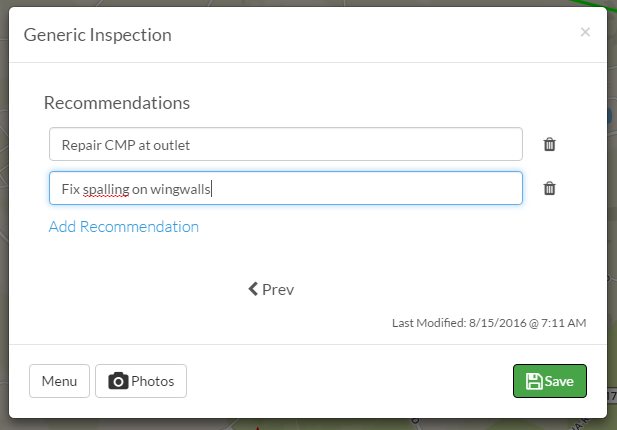
7. Make a few recommendations and click 'Save'....
8. That's it! If you return to the map - you'll now see a time-stamped entry in the inspection table. This is now accessible to anyone that has permission on your CSDatum account.
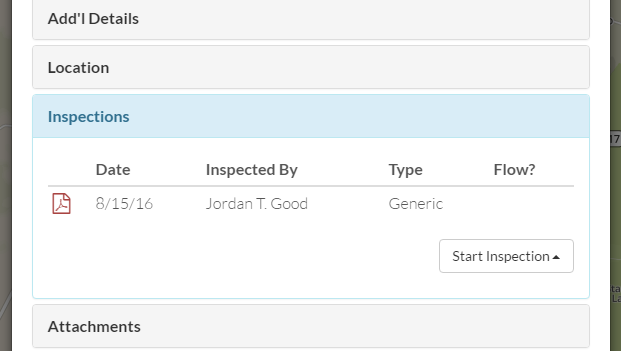
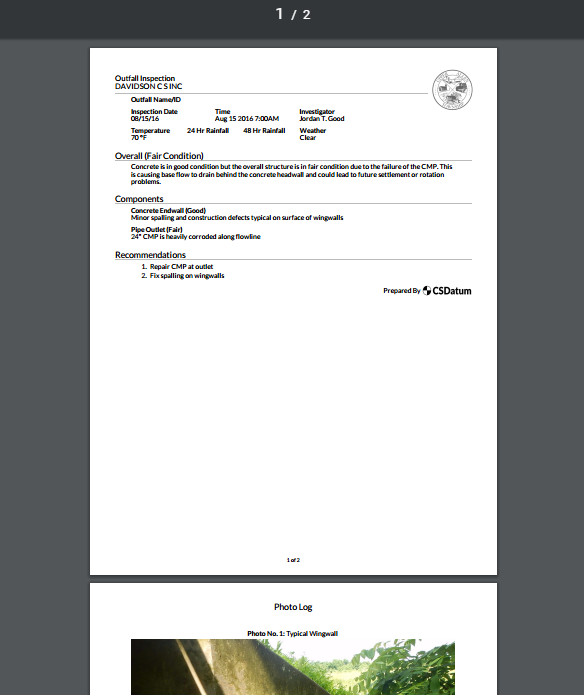
8. Need a PDF record? Simply click on the icon in the table - and you'll see your inspection findings recompiled in a tidy report like so - complete with photo log.
And as mentioned earlier, those hyper-specific inspection forms are still there (think of the PA DEP Illicit Discharge form). We'll continue to build powerful forms like that - but we wanted to provide a simple and consistent way to document your findings for EVERYTHING.
Have a question about how to use this new feature? Let one of us know.
